Migrate to v2
Chainlink Automation 2.0 is a consensus-driven Automation solution that allows you to cut onchain gas costs by using cryptographically verified offchain compute. Automation 2.0 provides 10M gas worth of offchain compute, which is significantly more than previous versions. Additionally, Automation 2.0 provides increased reliability, performance, log trigger capability, and the ability to use StreamsLookup to retrieve Data Streams.
You can migrate most upkeeps that use Automation version 1.2 and later in the Chainlink Automation App or in the block scanner. When you migrate upkeeps through the registry, you retain the Upkeep ID. Before you migrate, read the migration checklist to maximize your benefits from Automation 2.0.
For upkeeps on older registry versions 1.0 (Ethereum Mainnet), and 1.1 (BNB Mainnet and Polygon Mainnet), you must migrate manually by cancelling and re-registering your upkeep in the Chainlink Automation App. After you do this manual migration, future migrations will be easier because your new upkeeps will be eligible for the simpler migration process.
Migrating using the Chainlink Automation App
The Chainlink Automation App offers a streamlined migration process for upkeeps using registry versions 1.2 and later. To migrate upkeeps with older versions, follow the manual migration process instead.
-
Navigate to the Chainlink Automation App, select the supported blockchain you're using, and connect your wallet.
Note: Automation 2.0 runs on registry version 2.1. This discrepancy will be reconciled in a future version.

-
To start migrating a specific upkeep, select the upkeep. In the Details page, expand the Actions menu and select Migrate upkeep.
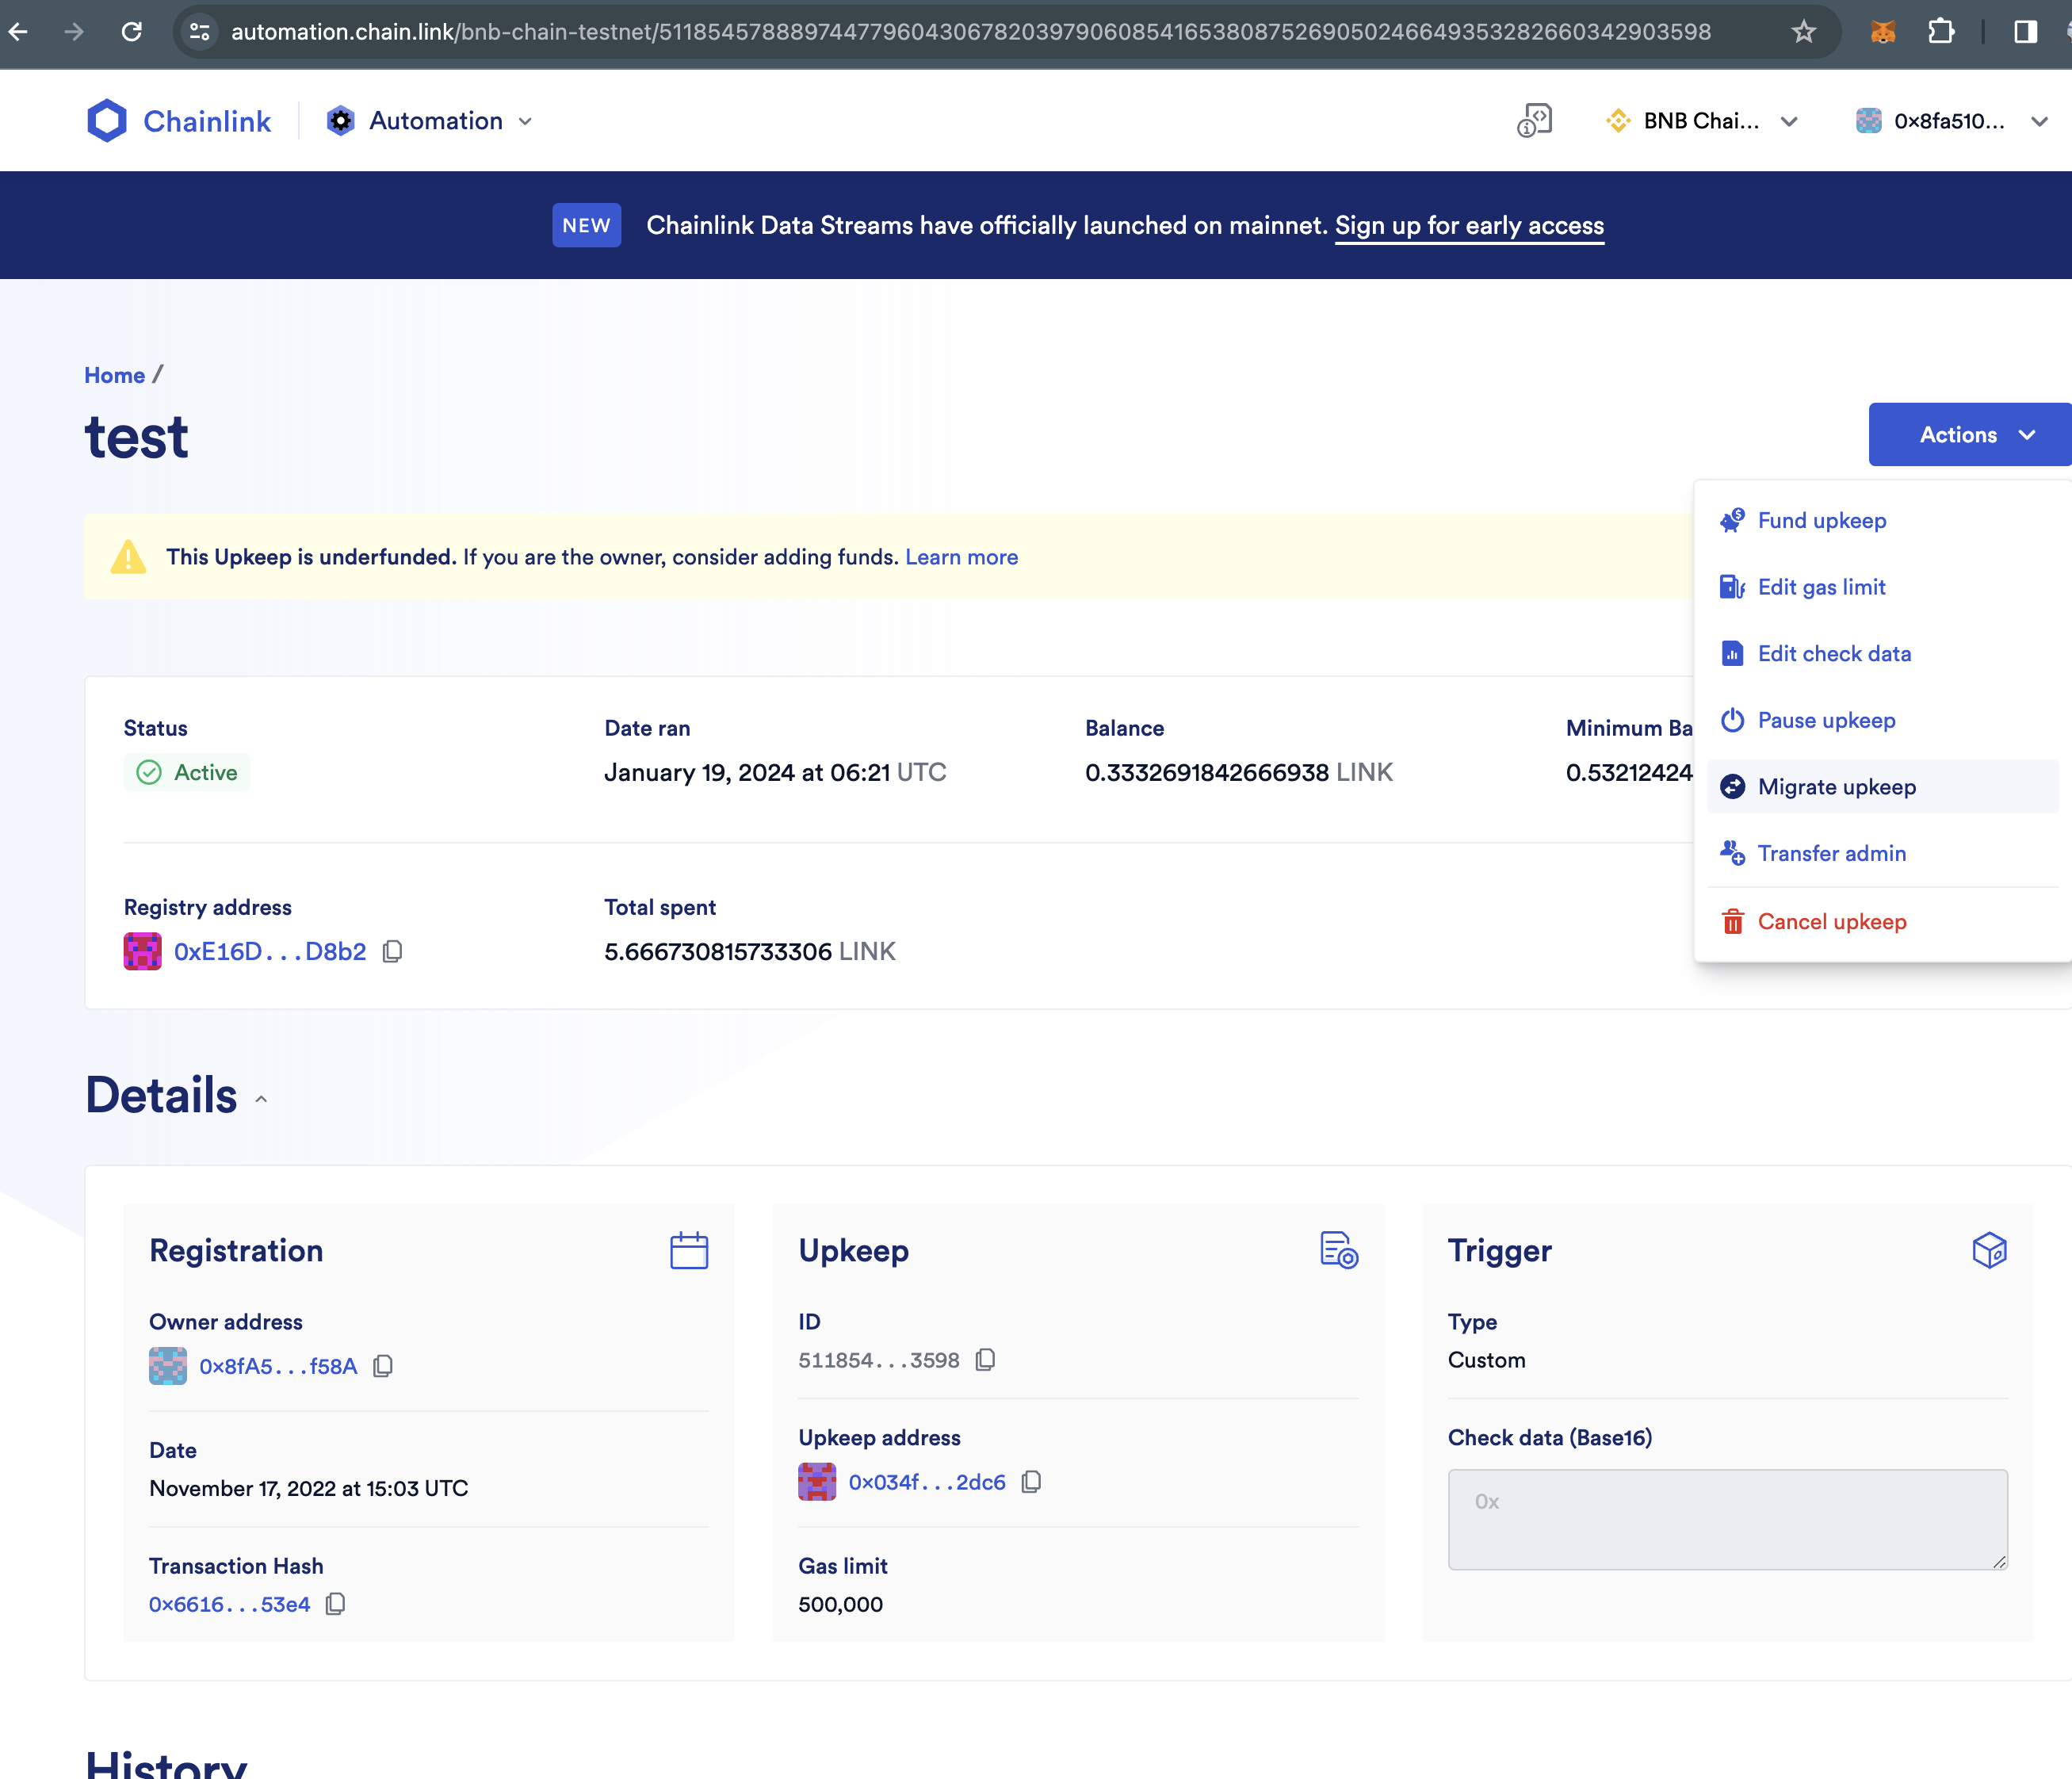
If you have multiple upkeeps to migrate, start the migration using the link in your upkeeps dashboard. This link displays only if you have one or more upkeeps to migrate:

-
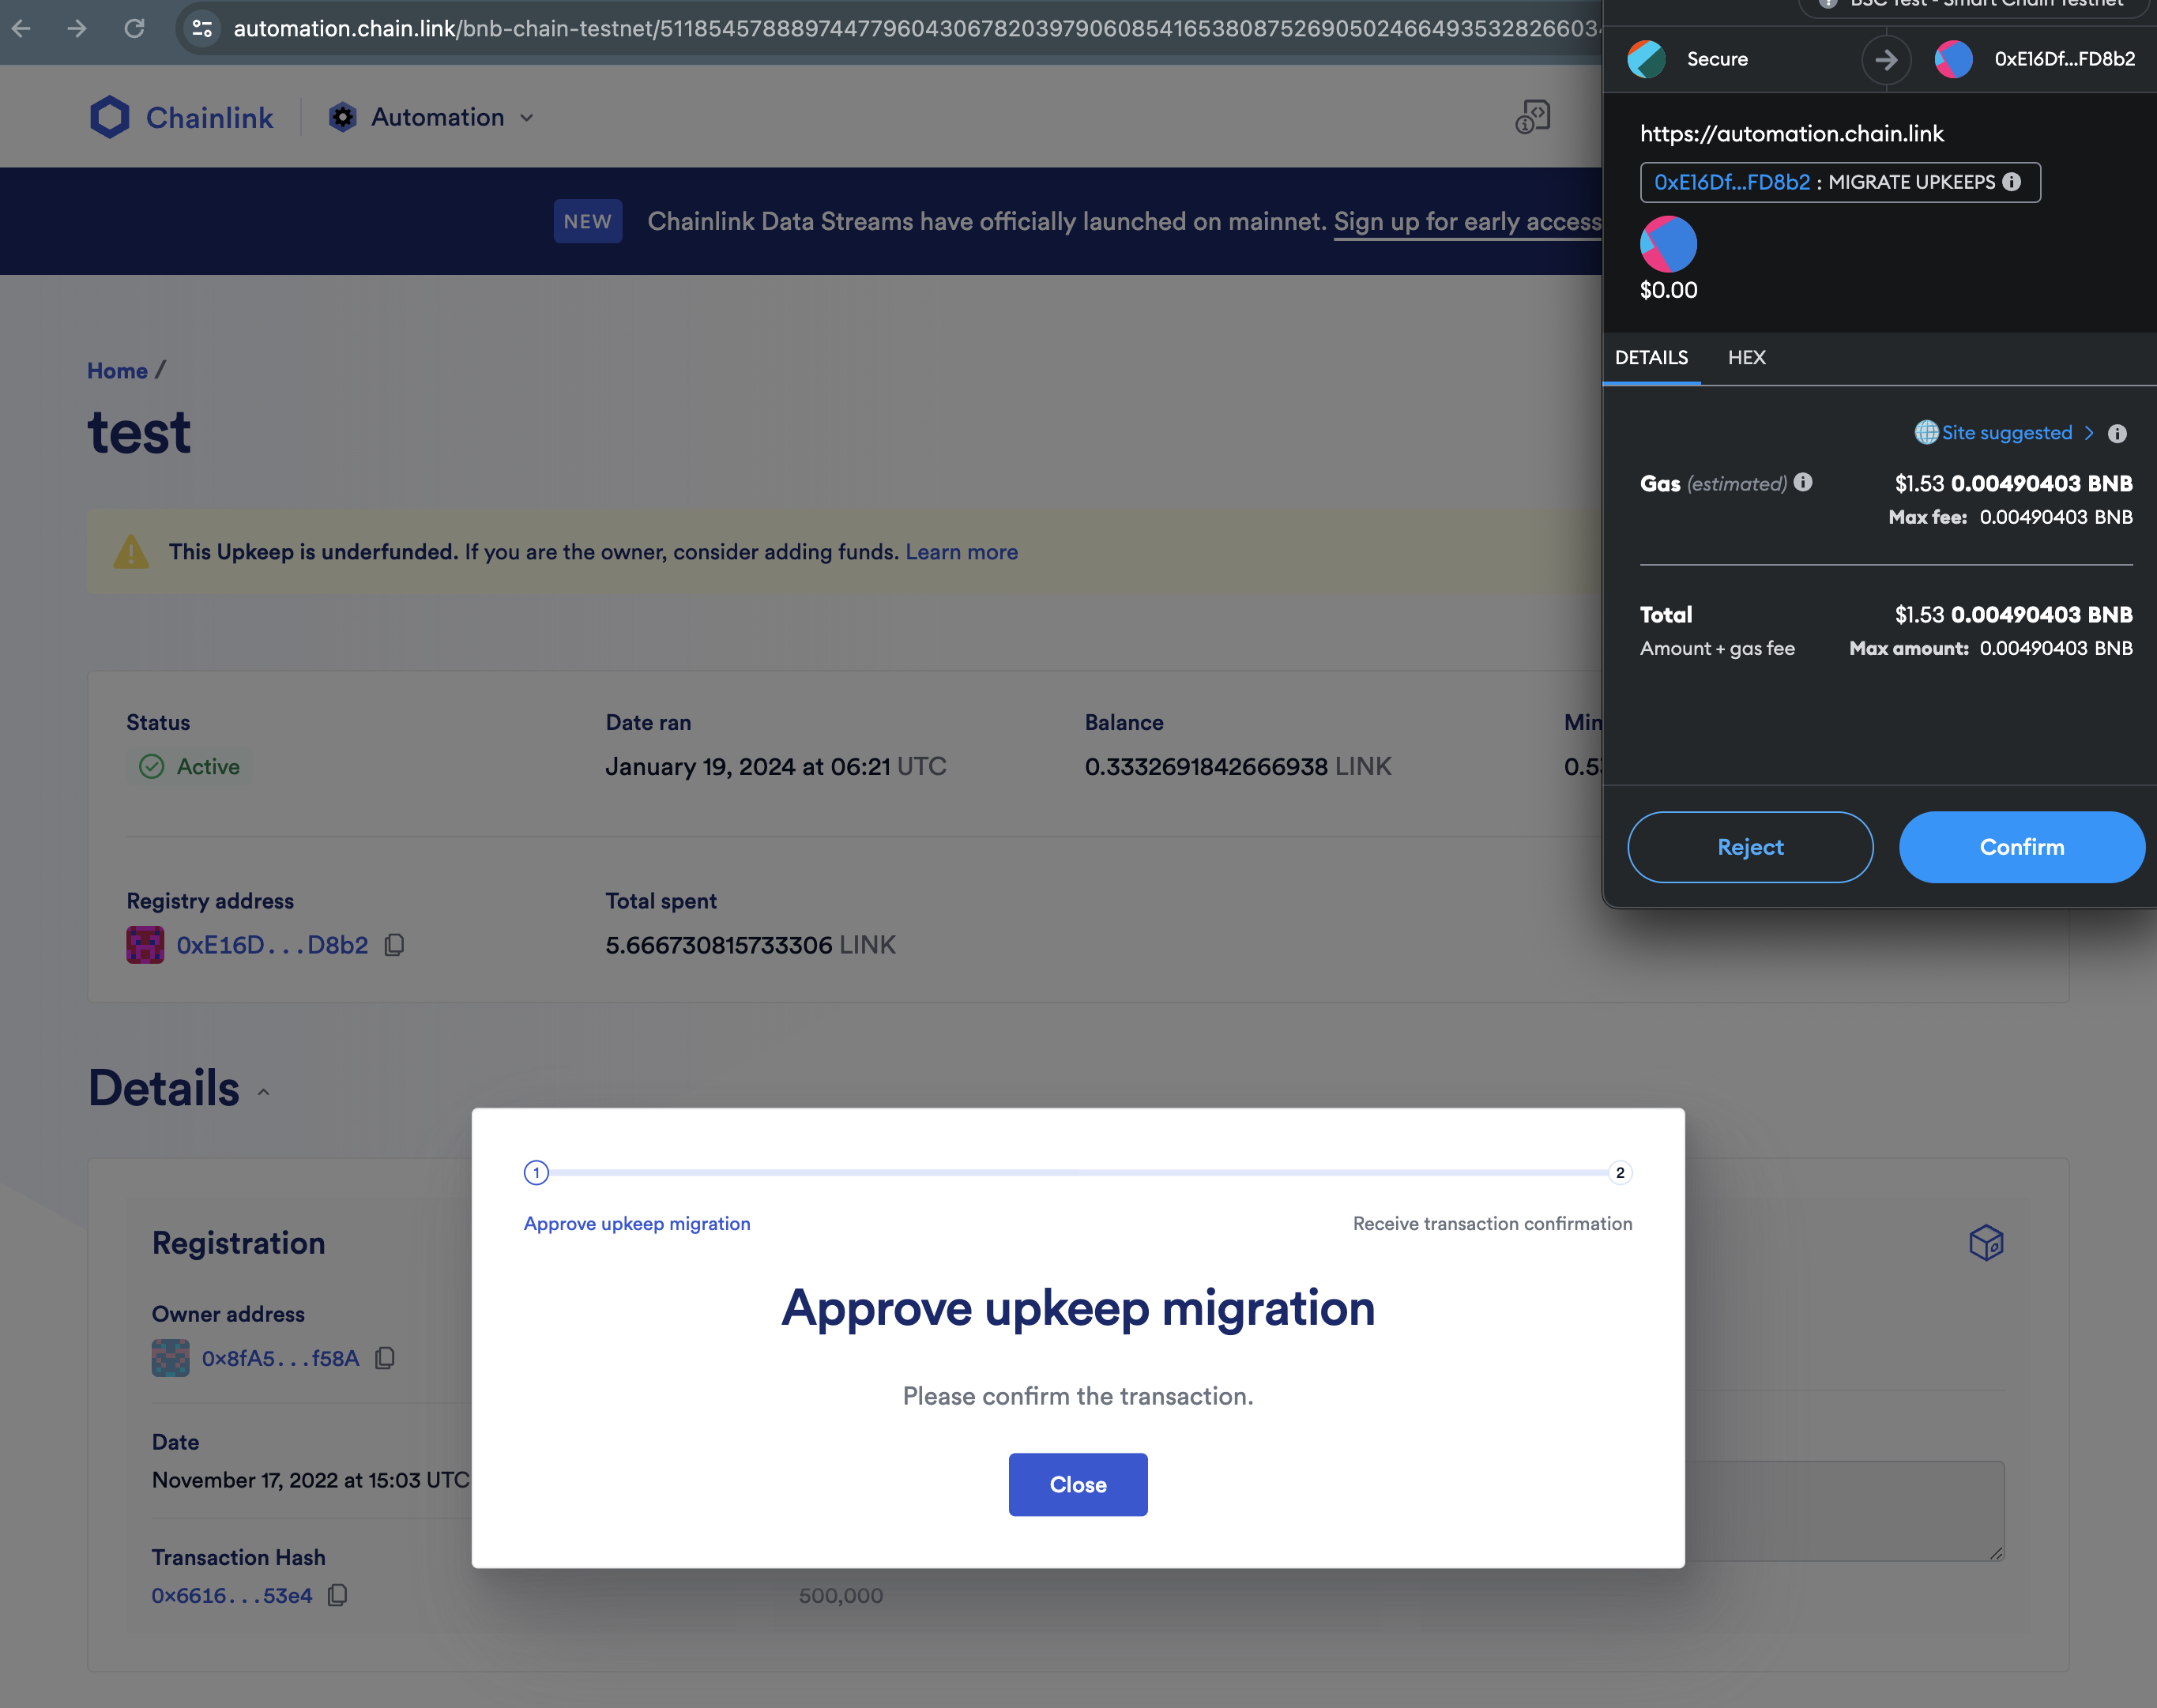
Follow the prompts to approve and confirm the transactions in your wallet to migrate your upkeeps.
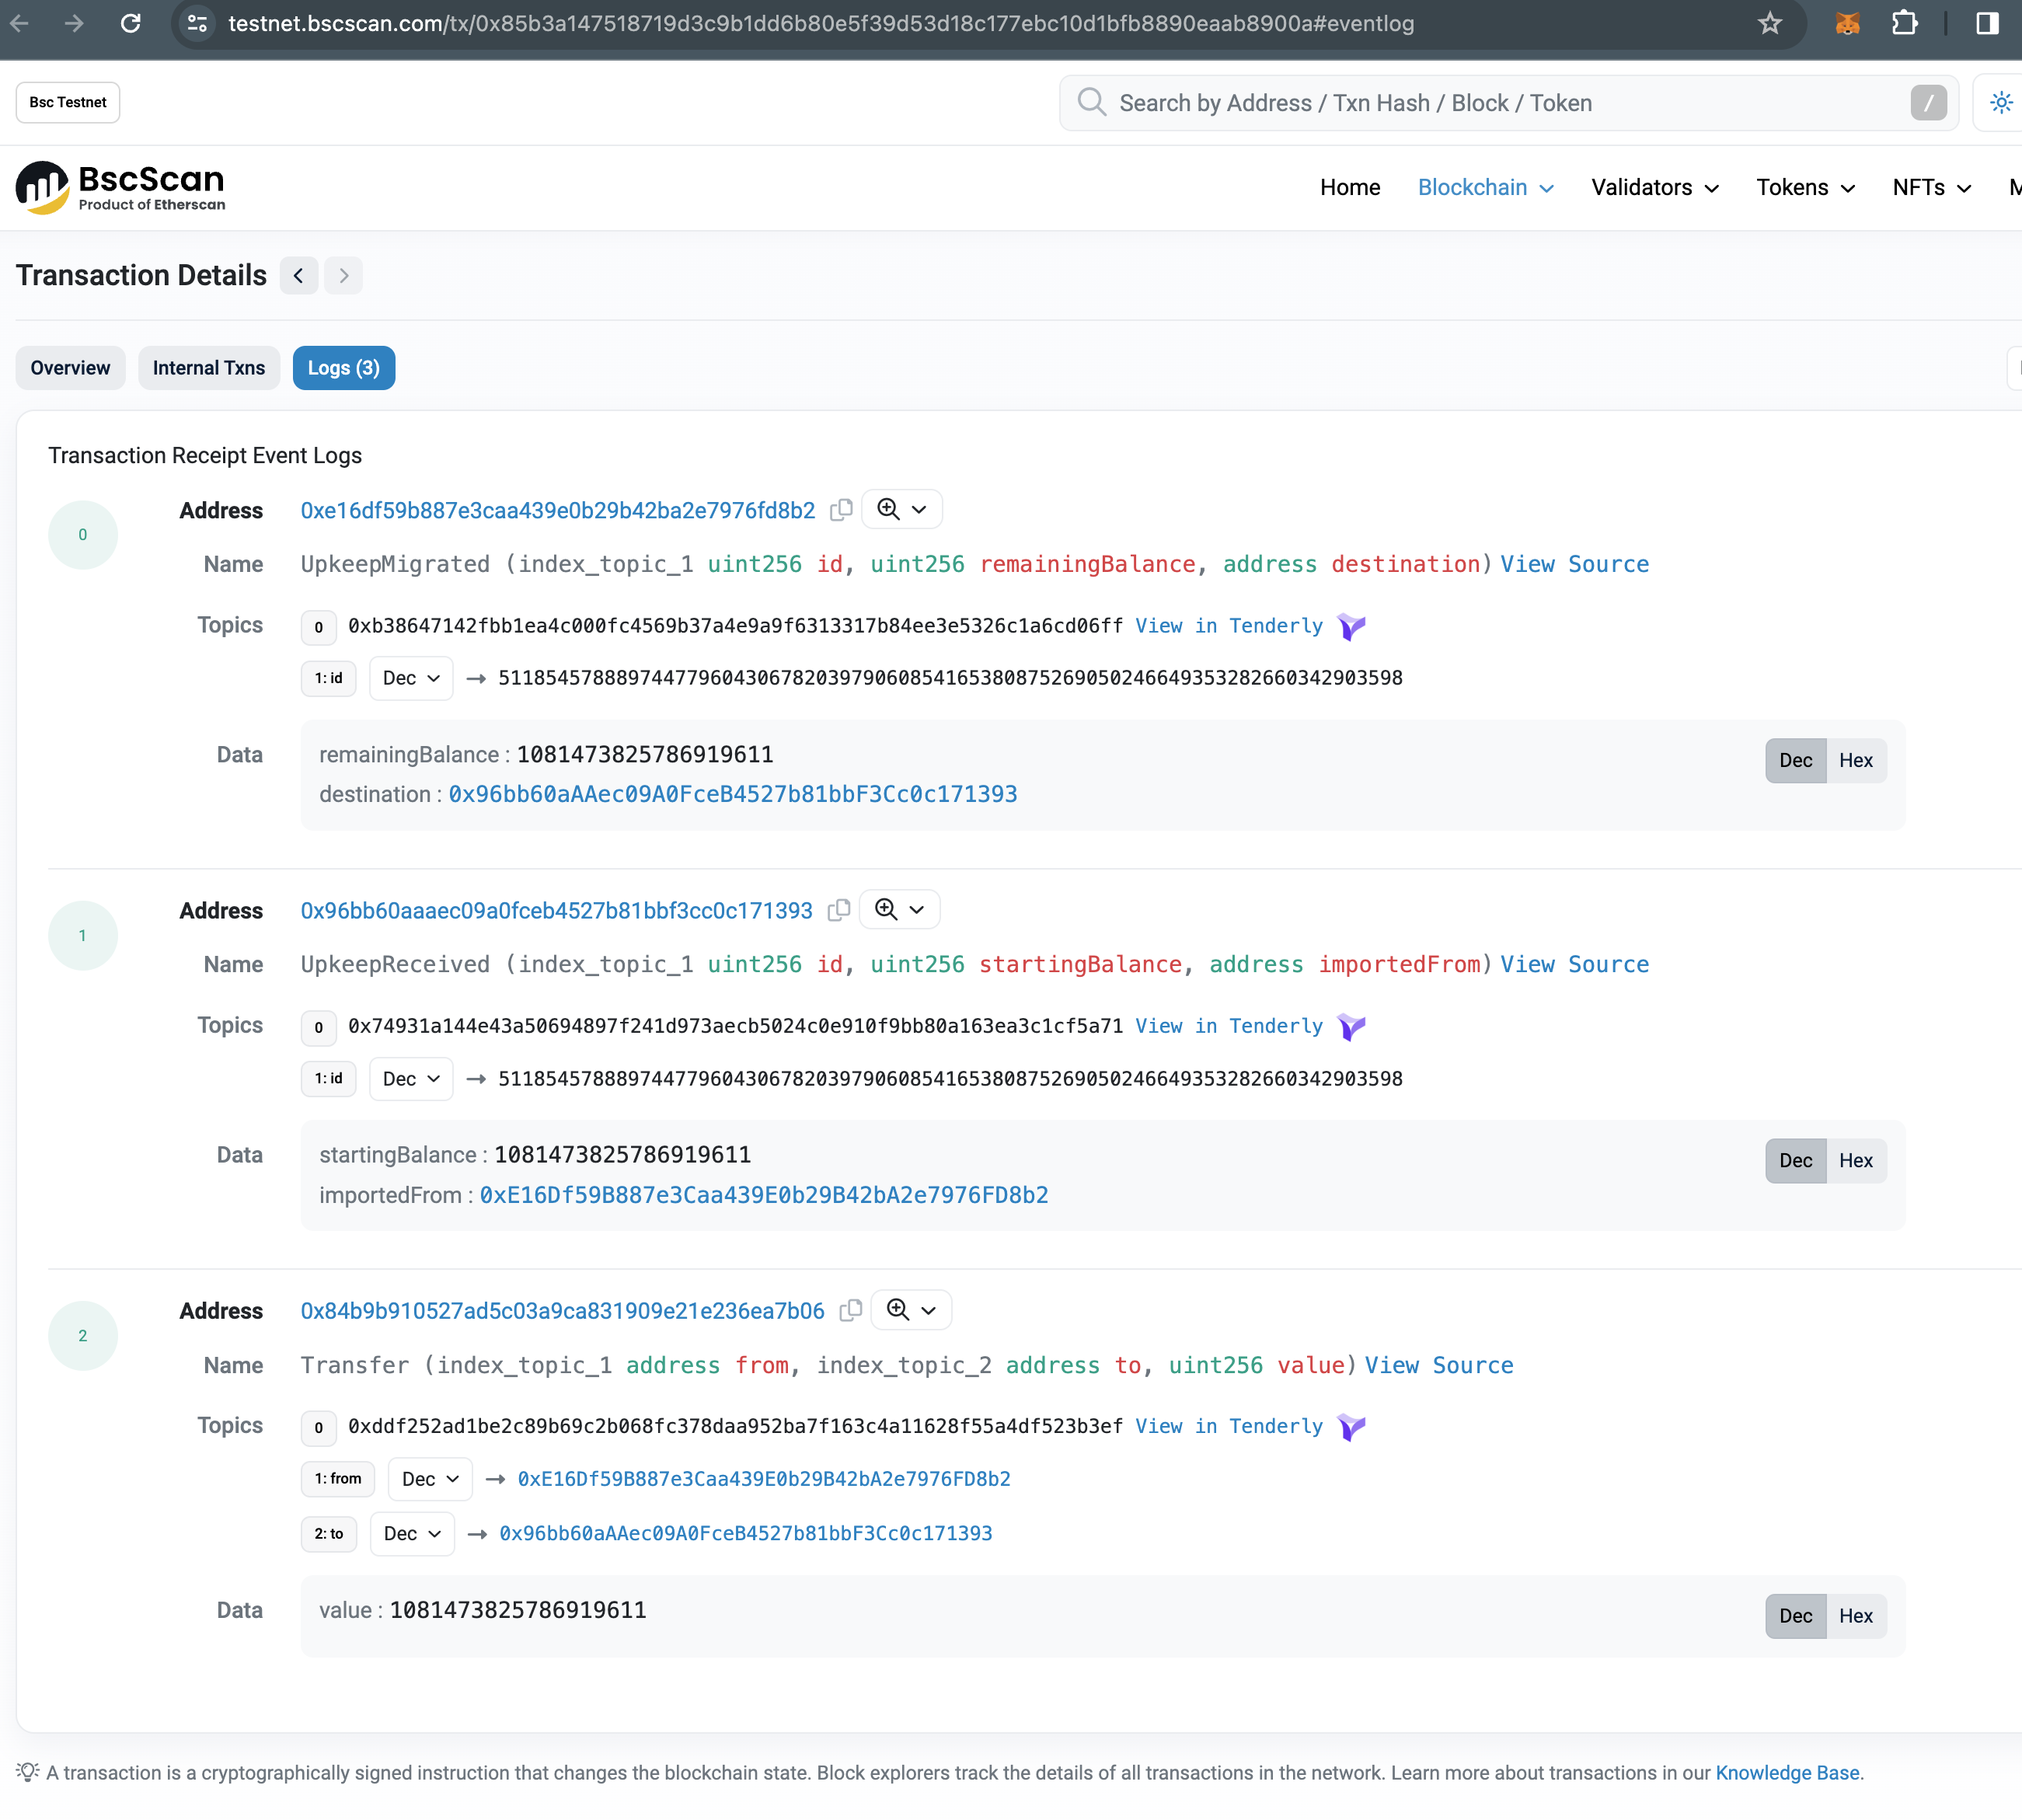
Upkeeps that are successfully migrated will show the following transaction logs:
-
If your upkeep restricts
msg.senderto the previous registry address, update your contract to use the new forwarder address.
After the migration is complete:
- Your balance is transferred to the new registry automatically.
- The new forwarder address becomes available.
- Read the migration checklist to understand further updates you might need to make in your contracts.
Migrating upkeeps using block scanner
To migrate one or more upkeeps using the scanner:
-
Navigate to the blockscanner for the desired chain to the Automation registry containing your upkeeps. You can find the registry address in the Chainlink Automation App under Upkeep details.
-
Under Contract/Write contract expand the
migrateUpkeepsfunction.Enter a list of upkeep IDs. For example:
[99297446083125056953495436926707926113001699970195513612134585638496630959874,63026166139768298778579034679995711427803187091626268721992534052921779884688]. -
Enter the destination registry address, which is the latest registry address on this chain. You can find this address on the Supported Networks page, or at the top of the Chainlink Automation App with the desired chain selected.
-
Execute the
migrateUpkeepsfunction and confirm the transaction. When this transaction is confirmed, your upkeeps will be migrated to the latest registry, and each upkeep will have a unique forwarder address. -
If your upkeep restricts
msg.senderto the previous registry address, update your contract to use the new forwarder address.
After the migration is complete:
- Your balance is transferred to the new registry automatically.
- The new forwarder address becomes available.
- Read the migration checklist to understand further updates you might need to make in your contracts.
Migrating older upkeeps manually
For upkeeps on registry versions 1.0 and 1.1, you must migrate upkeeps manually:
-
Navigate to the Upkeep in the Chainlink Automation App.
-
In the Details section, navigate to the center Upkeep card. Copy the Upkeep address - you need this for Step 5.
-
Expand the Actions menu and select Cancel upkeep.
-
Approve the transaction in your wallet. When this transaction is confirmed, you must wait 50 blocks before you can withdraw funds.
-
Return to the main Chainlink Automation App landing page. Register a new upkeep, providing the Upkeep address of your old upkeep.
-
If your upkeep restricts
msg.senderto the previous registry address, update your contract to use the new forwarder address.
After migration, you have a new upkeep on Automation 2.0 with the same interface as your old upkeep. Future migrations are eligible for the simpler migration process.
After the migration is complete:
- Your balance is transferred to the new registry automatically.
- The new forwarder address becomes available.
- Read the migration checklist to understand further updates you might need to make in your contracts.
Update permissions
Your new upkeep has a new unique forwarder to increase security for your upkeep. This address will be the unique msg.sender for your upkeep. If your upkeep restricts msg.sender to the previous registry address, you must give permission to the forwarder address. Otherwise, Automation will no longer be able to execute your function.
-
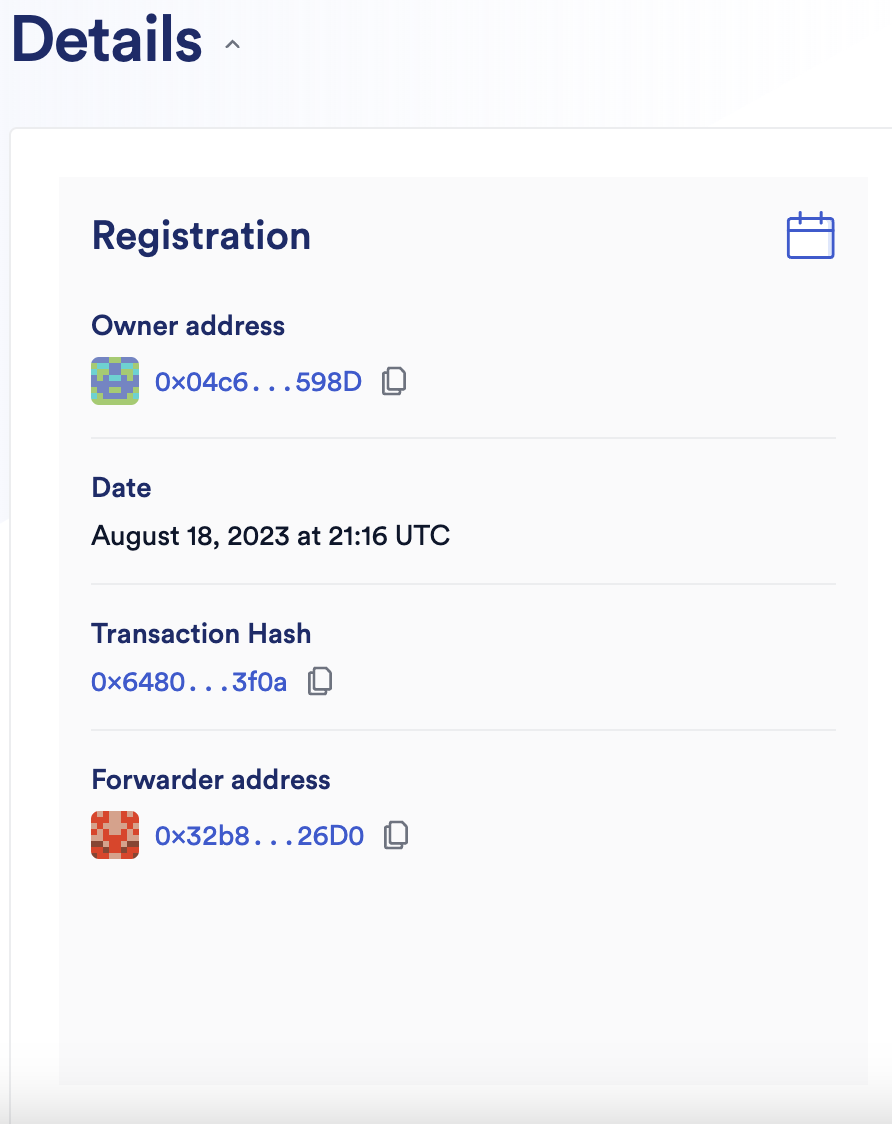
The forwarder address becomes available after migrating your upkeep. You can find this in the Chainlink Automation App, within the upkeep's Details section:
-
Update your contract to use the forwarder address by following the instructions on the Forwarder page.
Forwarders by upkeep type
This diagram shows the flow of different contracts that Automation 2.0 deploys for new and migrated upkeeps. Compared to custom logic and log trigger upkeeps, time-based upkeeps have an additional contract:
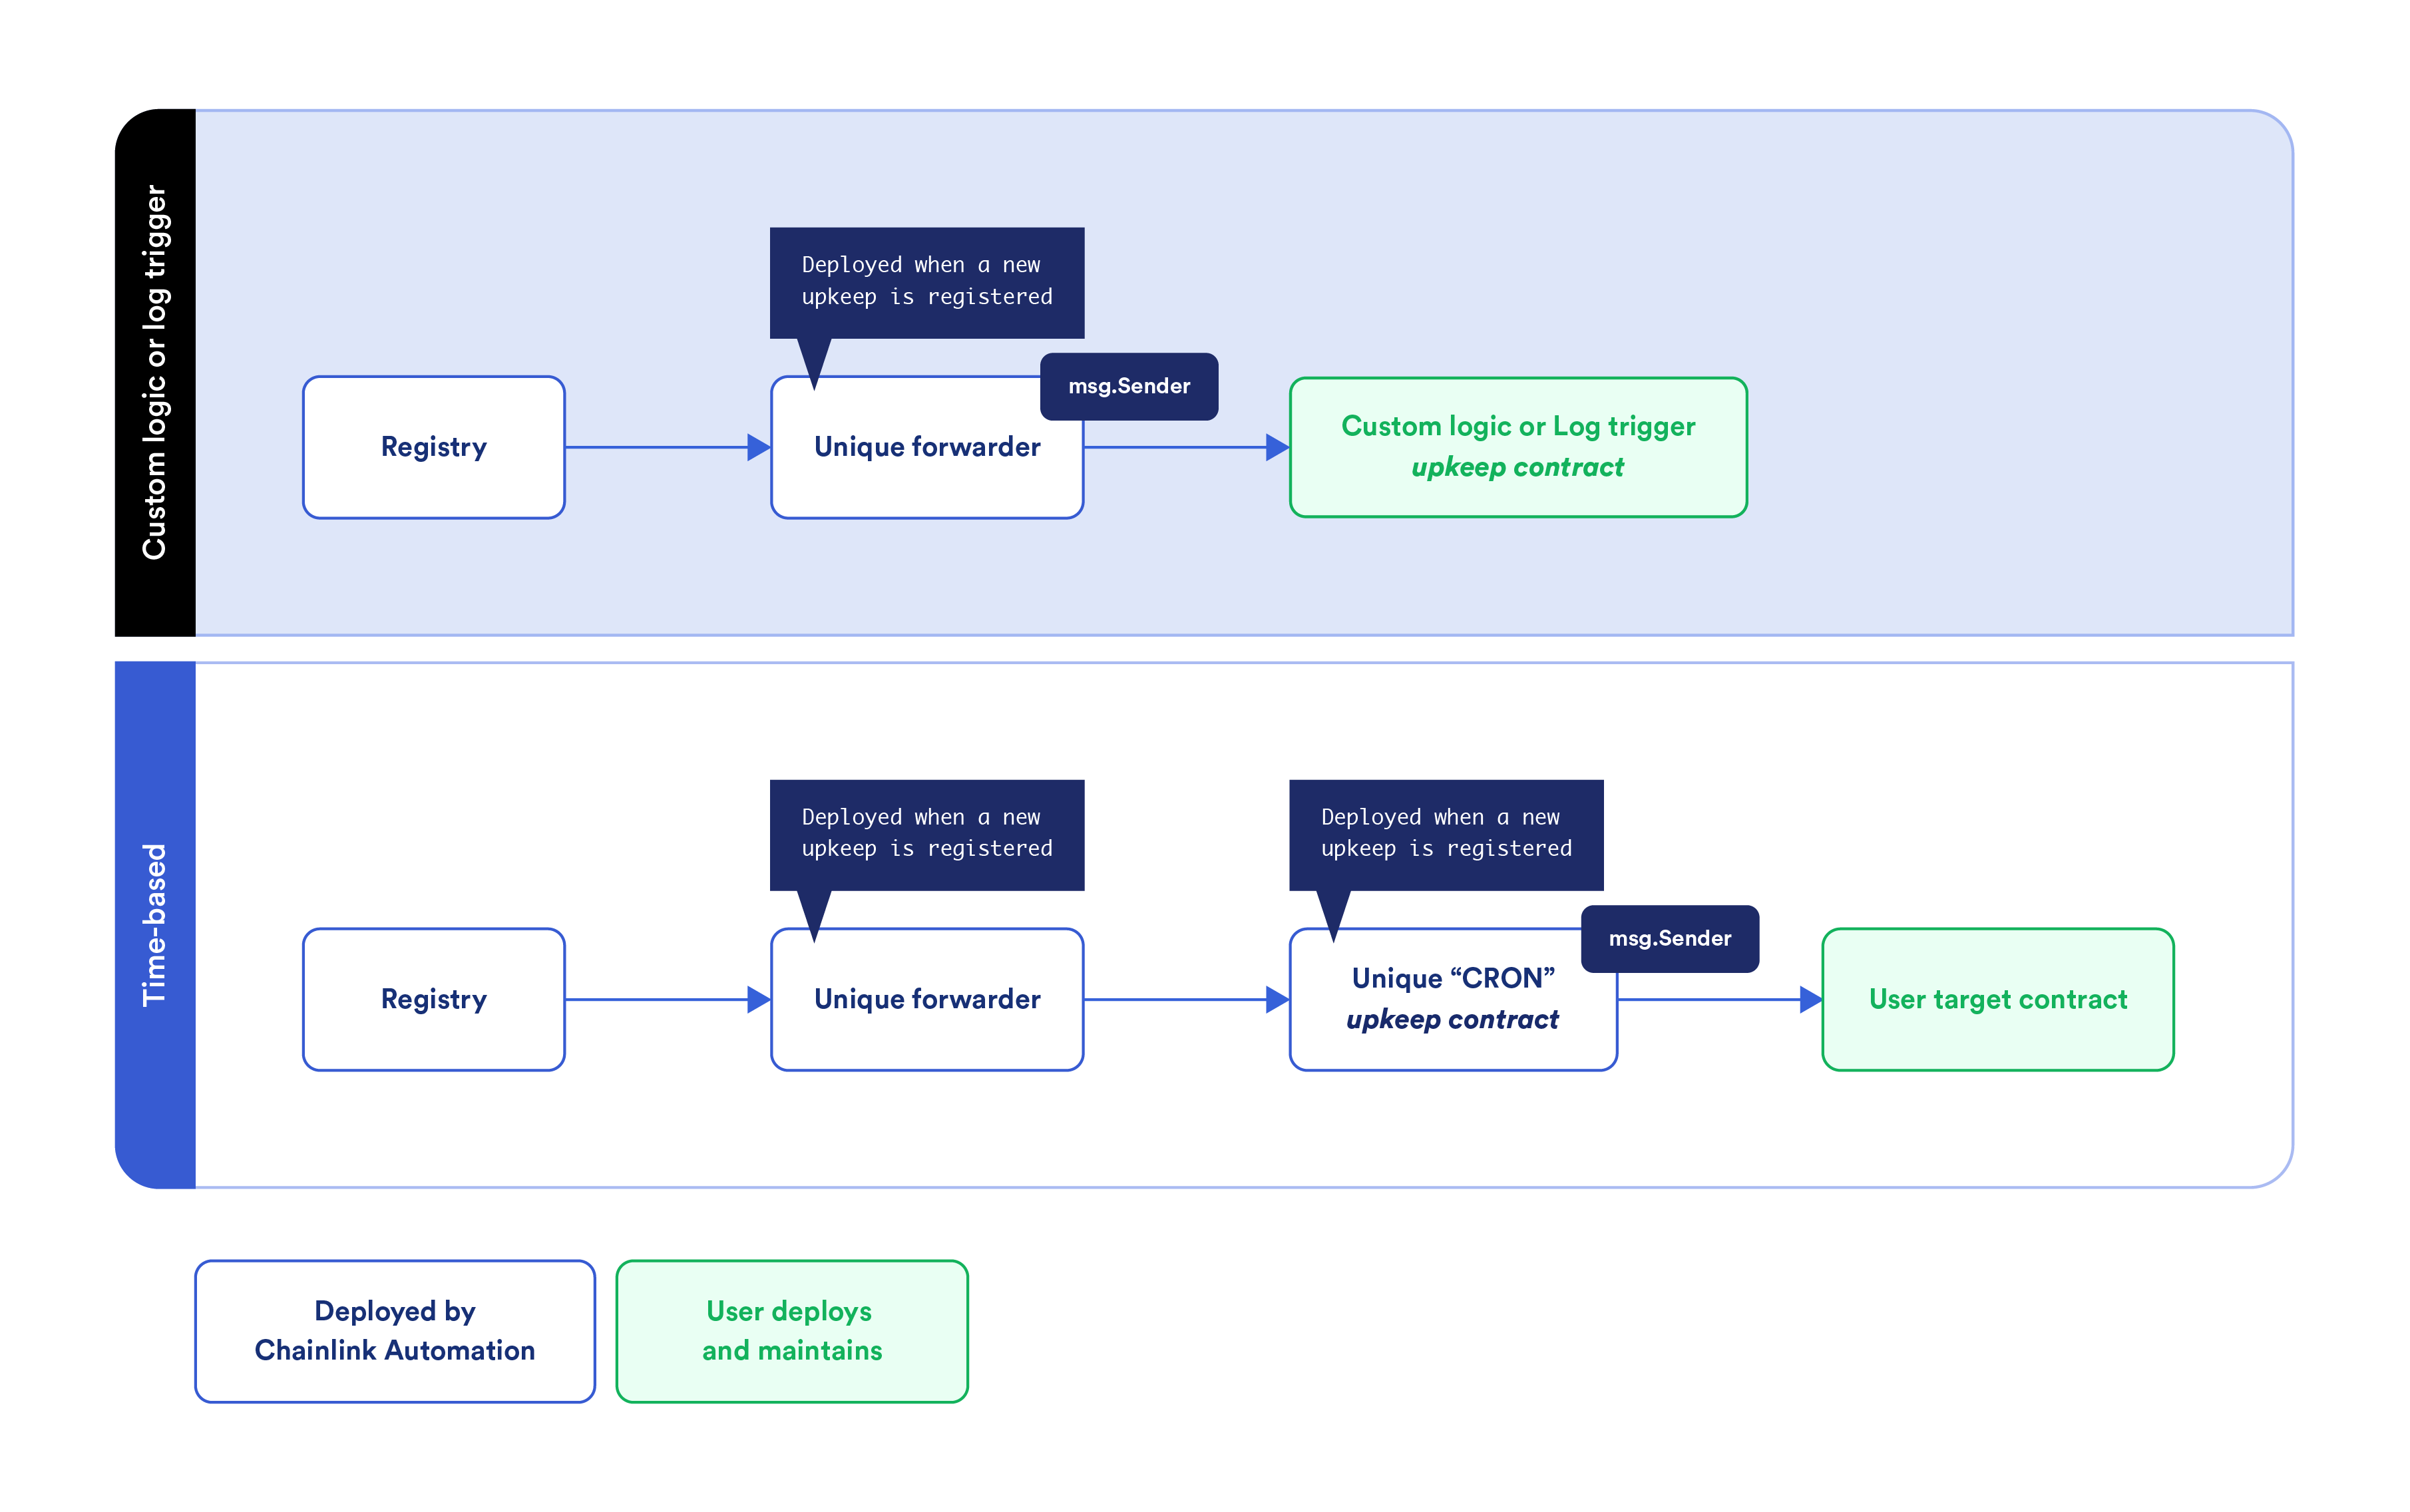
- For custom logic and log trigger upkeeps, the
msg.senderin relation to your contract is the unique forwarder that Automation deploys when you migrate your upkeep. - For time-based upkeeps, Automation deploys a unique forwarder and a unique CRON upkeep contract. In this case, the CRON upkeep contract is the
msg.senderin relation to your contract.
Migration checklist
Before you migrate, be aware of several important changes listed here.
Unique forwarder
Automation 2.0 Upkeeps are called from a unique forwarder per upkeep and not from the registry. If your upkeep restricts msg.sender to the previous registry address, you must update it to the newly created forwarder address. The forwarder address becomes available only after the upkeep has been migrated. This forwarder address will remain constant in future migrations.
Update programmatic upkeeps
Note that migration moves upkeeps from one registry to another. If you interact with your upkeep programatically using Solidity or other interfaces, you must update your code to make sure that you are referencing the correct registry and registrar for your migrated upkeeps:
- Update the registry and registrar addresses.
- Ensure you use the latest version of the ABI for the registry and registrar.
Get the latest ABI
The latest ABI for Automation 2.0 is in the @chainlink npm package:
- Registry ABI:
@chainlink/contracts/abi/v0.8/IKeeperRegistryMaster.json - Registrar ABI:
@chainlink/contracts/abi/v0.8/AutomationRegistrar2_1.json
After updating to the latest ABI, you will able to execute registry.getForwarder(upkeepID) to get the forwarder address in Solidity.
Check function signatures
If your contract makes function calls to the registry from your upkeep contract, follow the latest ABI.
Funding is moved with migration
When you migrate, your LINK funding is moved from one registry to the next automatically.
Migration questions and feedback
If you have questions or feedback, contact us in the #automation channel on the Chainlink Discord server.